Now this is by far my biggest post so hang in there but I couldn't resist. These are just too cool to leave out.
Danielle from Thompson Family Life.
This is Danielle Thompson here, guest blogging for our lovely Alix while she’s away in Prague! Thank-you Alix and Dottie for letting me post here at Modern Kiddo. It is one of my favorite kid-themed blogs, so I’m quite honored to be posting here! I’m sharing a super-cute DIY tutorial with you today that would be *perfect* for a boy’s room, but you could always change the color palette for that little girl in your life. I have two boys, and any mother out there with boys knows what I mean when I say it is HARD to find unique and cool things for boys when it comes to decor (and clothes!).
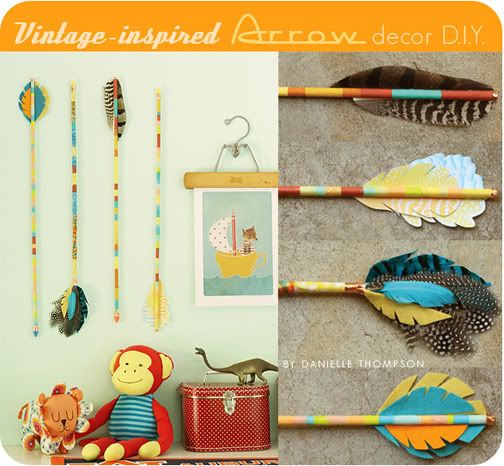
I’ve been in the process of redecorating my boys’ room since they “moved in together” and are sharing a room. I’ve been perusing the interwebs for months now searching out the perfect items. I remember I had a thought one day that vintage arrows would be so cool as decor, displayed on the wall somehow. Arrows are such a classic symbol and evoke the “cowboy and indians” game that boys have played for ages!
So, I looked online on Etsy & Ebay and found some, but they were pricey! So, I thought to myself “Hey! These wouldn’t be so hard to make!” I considered going to a local archery store for supplies to make some authentic looking ones, even looking online for the “correct” way to make one. (thinking the Cub Scouts would probably know!) Then I decided it would be more fun (and inexpensive) to make my own version with various things I already had on hand in my craft stash and at my local craft store. This is what I came up with.
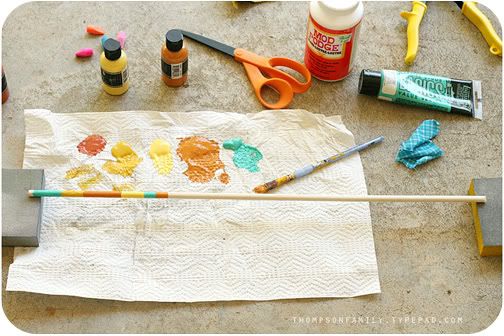
Supply List:
(most of these items you probably already have or can easily find at your local craft and home improvement store.)
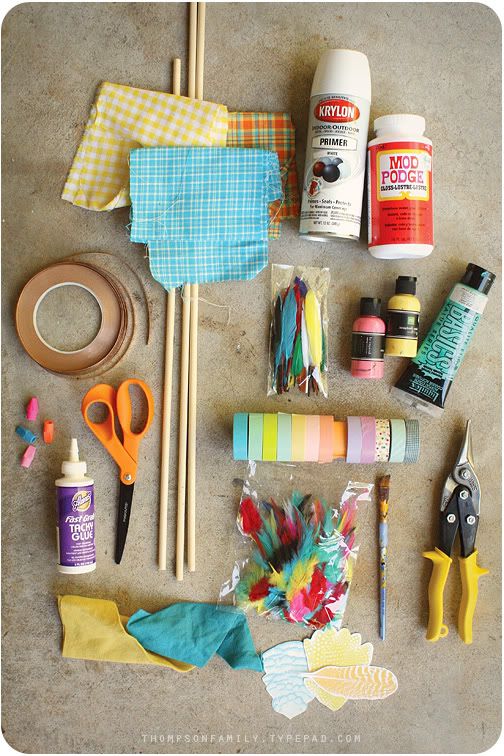
- wooden dowels
- fabric scraps
- spray primer
- Mod Podge
- Tacky Glue (I used “Fast Grab” Tacky Glue)
- copper tape (I could only find this at Joann’s Crafts – it wasn’t at Michaels or Home Depot)
- variety of real feathers (you can get some at your craft store, or you can find nicer ones online from a millinery supply. Etsy is a great source.)
- felt scraps (I used wool felt)
- paintbrushes
- scissors
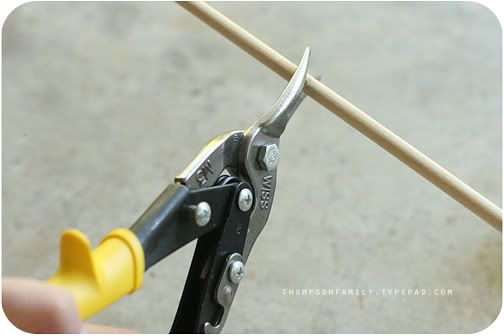
- heavy-duty metal cutters (I used these to cut my dowels shorter, but you could use a saw, or whatever you have on hand)
- washi tape
- acrylic paint
- pencil erasers
- paper feathers
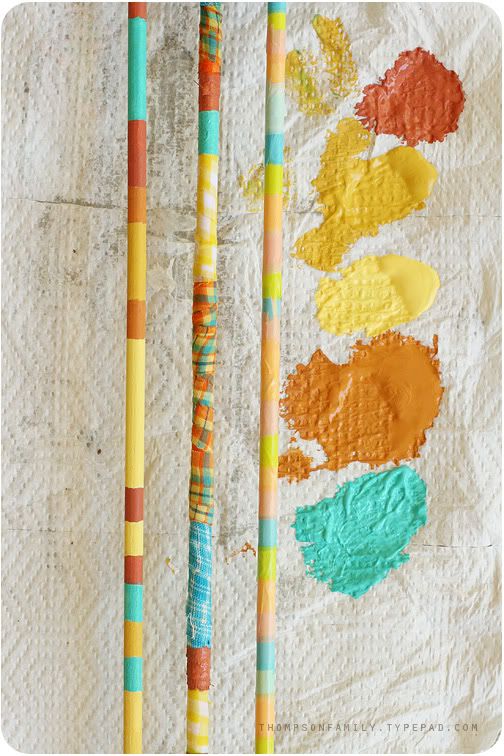
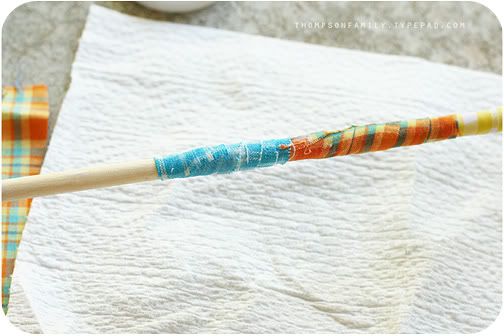
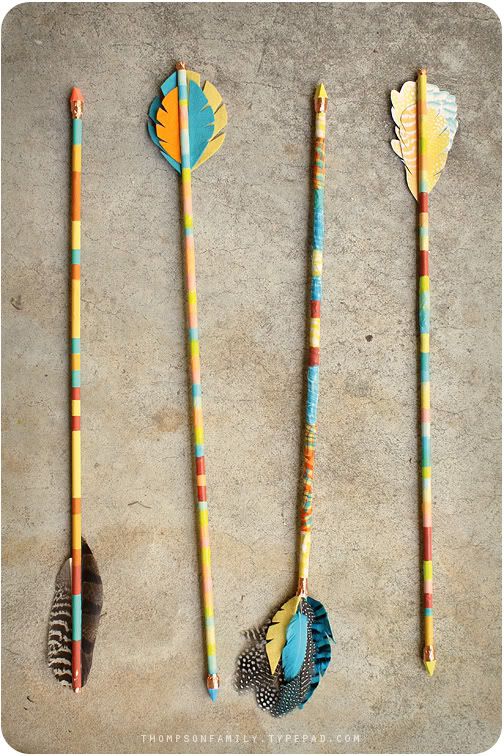
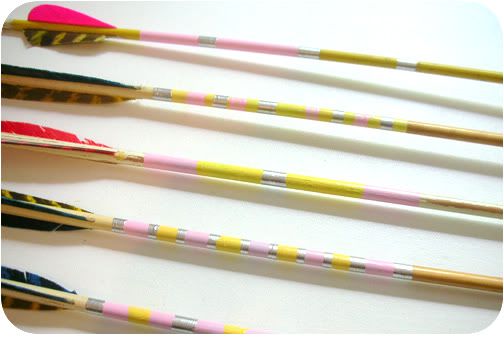
I used three different methods to decorate my dowels: painting, covering with washi tape and covering with fabric scraps. You could try all of these for a diverse arrangement of arrows, or you could pick your favorite method and stick with that. The washi tape method went super fast. The painting and fabric method were a bit more time consuming (and messy.) First you’ll want to cut down your dowels to a good “arrow” size. I honestly can’t remember the exact size dowel (diameter) I purchased, but if you purchase from Michaels, I believe they had yellow paint on the tip (color coded). I used my metal cutter, but you could cut it down with a saw or knife.
ARROW #1
First, we’ll do the Washi Tape method. I’ve been hoarding this tape for months and was so happy to finally get to use it! You can find Washi Tape online. Get your tapes out and start wrapping. I used short lengths of tape so that I could ration it and not waste a lot.
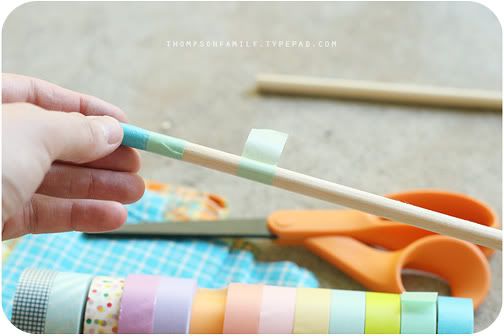
When I completed each wrapped section, I would cut off the excess using scissors, instead of just tearing it off. It made for a more tidy look. I used several different colors of tape and just made up a random pattern.
This was by far the quickest and easiest method! Instant gratification and I love the watercolor-y look to it. I ended up adding a coat of Mod Podge all over it because the little strips of tape were coming up after a while. The glue really helped this problem. Put this aside to dry.
ARROW #2
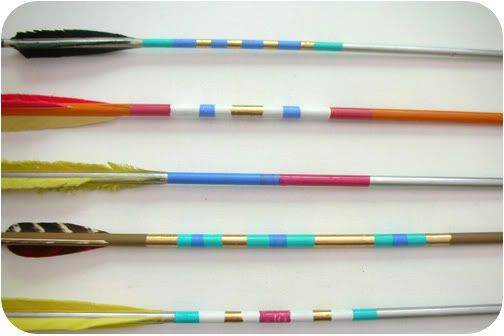
Now we’ll try the painting method! (You’ll want to use a similar color palette on all of your arrows if you plan on displaying them together. Keep this in mind when you gather your tapes, paint and fabric scraps in the beginning.)
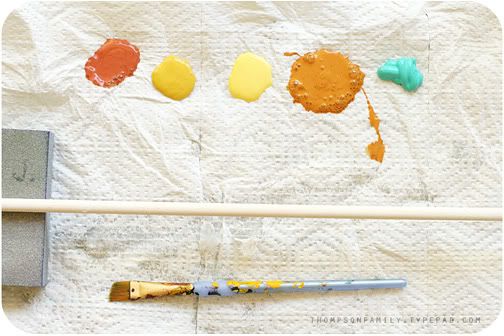
Pick out the colors you want to use. You’ll want to place something under each end of your dowel so that it won’t stick to the surface you are working on and so you won’t mess up the paint. I used a sanding block on each end.
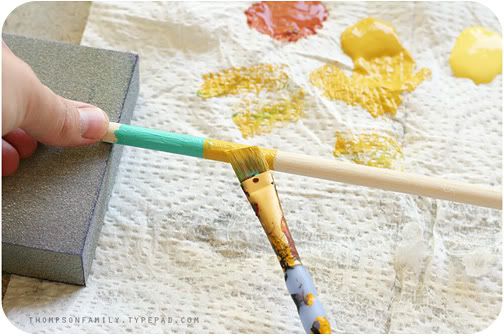
Start adding your stripes of paint. I placed my thumb on the end where I started and just rolled it forward as I painted my stripe with my paint brush “traveling” around the dowel as I rolled, creating the stripe. Don’t fret if your stripes aren’t super straight and tidy. Mine aren’t and I like the rustic quality it adds. When you start each new stripe though, try not to paint on top of the edge of the previous stripe too much because the colors will mix, and you don’t want them mixing too much. Finish painting the entire dowel and then set it aside to dry (keeping it propped up on something).
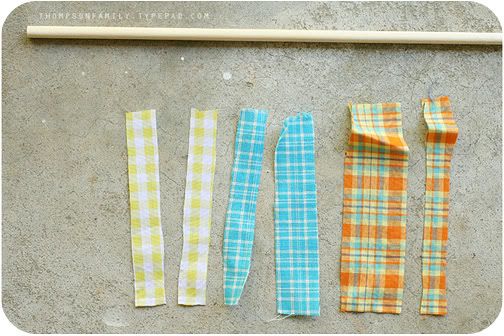
ARROW #3
Next we’re going to try the fabric covering method. Pick out your fabric scraps. Cut them into little strips like I did below. They were around an inch wide to four inches long, but really, any scrap will do. They don’t have to be perfectly cut as well. The fabric covered arrow ended up being much more of a rustic look, so it doesn’t have to be perfect. The imperfections are what gives it character.
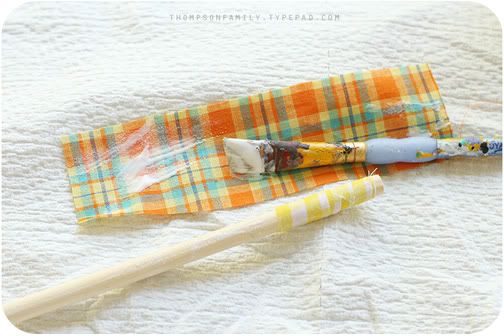
You’ll want to coat Mod Podge onto your dowel and your scraps. The easiest way I found to wrap the fabric was to hold the dowel at the bottom (holding it vertically), attach your first strip at the top, hold the end of the strip and spin the dowel with your bottom hand. It kind of wraps in a nice spiral as you go down. This is extremely messy because of the glue. I didn’t use gloves and I was peeling glue off my hands for what seemed like an eternity. ; ) So, you might want to use gloves?
Keep wrapping til you finish. Set it aside to dry. Make sure you coat the entire thing with Mod Podge so that the ends of the scraps don’t pop up.
FEATHERS.
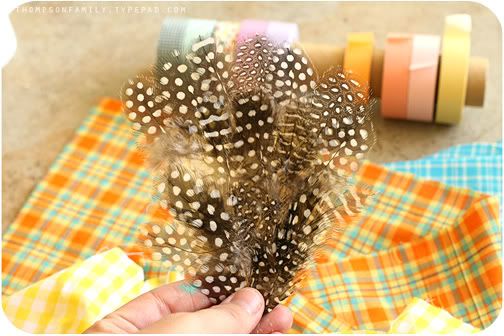
Now it’s time to add your feathers! I used a variety of items for my feathers, you could use which ever you like best, or do a mix like I did. Your feather options:
– real feathers
– felt feathers (cut from scraps of felt)
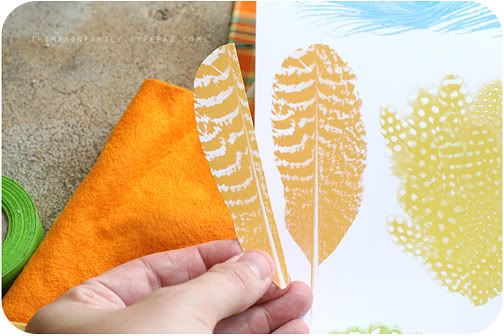
– paper feathers (print from my digital kit onto paper and then cut out)
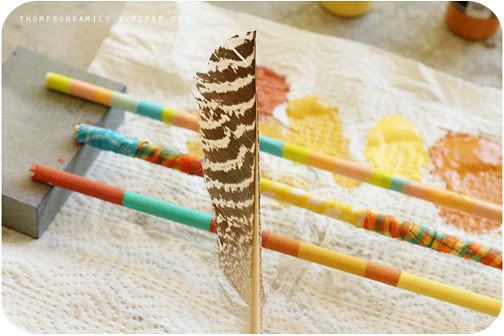
FEATHER #1
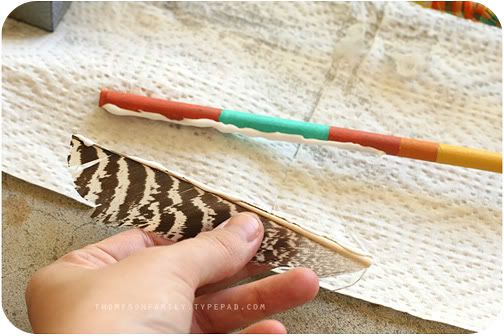
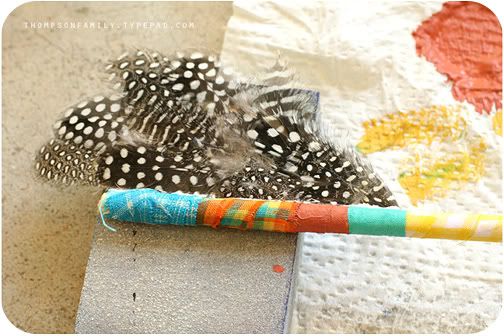
First we’ll use real feathers. I bought some from the craft store, but used mostly some that I had leftover from when I created my two feather digital kits! They were purchased from a millinery shop here in Atlanta, but you could also find them online. First, I used this brown feather (not even sure what kind of feather it is). You’ll want to cut off one side. Cut as close to the spine as you can.
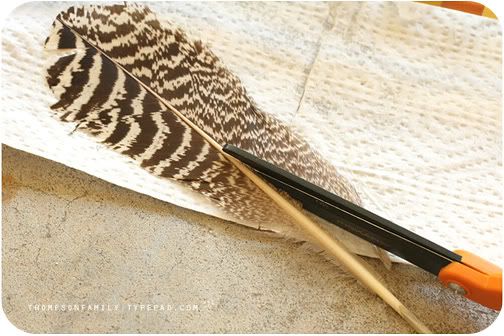
You’ll want to cut off that little “tail” at the end.
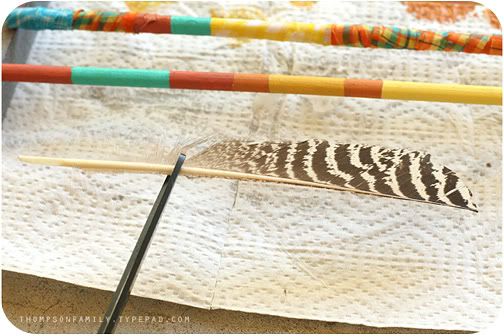
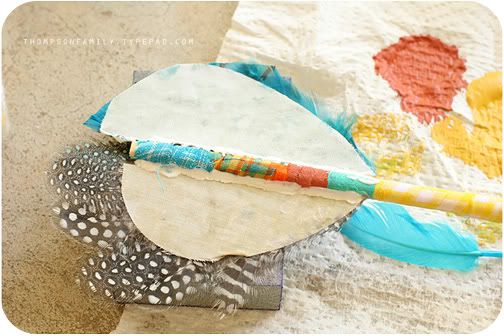
Now you’ll adhere your feather “vanes” to your decorated dowel. You could add glue to your dowel AND your feather so it really sticks, but towards the end of this project, i just added glue to one of them, and it worked fine. The “Fast Grab” Tacky Glue really grabbed it.. fast. ; )
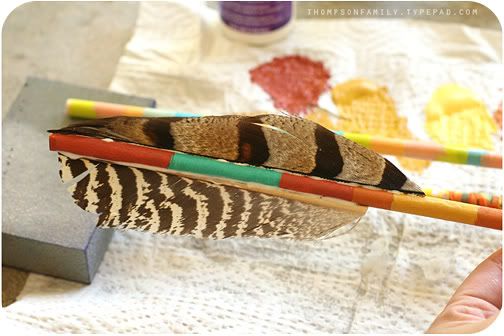
Add your other feather vane and you’re done. Next you’ll want to add a “target point” to your arrow. I wasn’t sure how I wanted to make this for my arrows since I wasn’t making a “real” arrow, I didn’t want to make anything too dangerous just in case the boys got a hold of it! ; ) As I was walking around the craft store, I saw these rubber erasers and loved the colors and they reminded me of an exaggerated arrow point. So I went with it. I wasn’t sure if it would look silly, but it ended up working well!
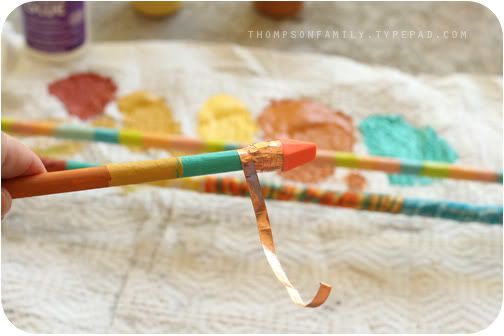
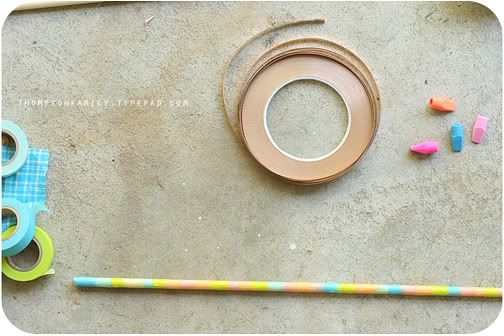
I wrapped copper tape around the bottom of the eraser as a design element to transition the dowel into the eraser tip. For some reason copper tape came to mind when I was thinking of supplies I needed for this project and I love the metallic element it adds. I could only find it at Joann’s (it wasn’t available at Michaels or Home Depot). It has a backing strip that you peel off. The tape is self-adhesive. You can find it in the stained glass craft section.
FEATHER #2
For the next arrow, I used several different kinds of feathers. The first one I used as the foundation is called a “feather pad”. You can find these at stores online, such as Etsy. Feathers are already glued onto (usually) a felt backing.
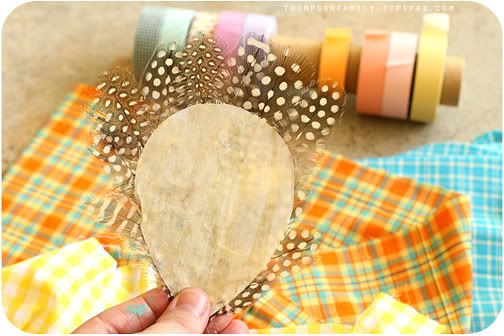
I cut mine in half and adhered it to my fabric covered dowel.
I then cut another feather pad in half and adhered it to the other side. This is what it looks like on the back.
I then started adding other real feathers to the top and also a felt feather.
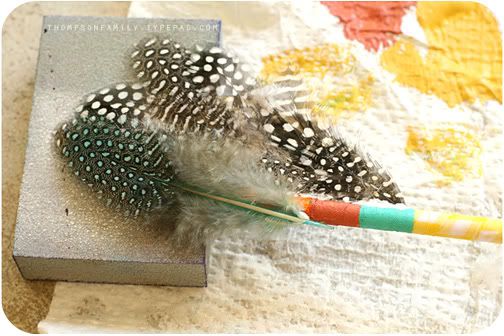
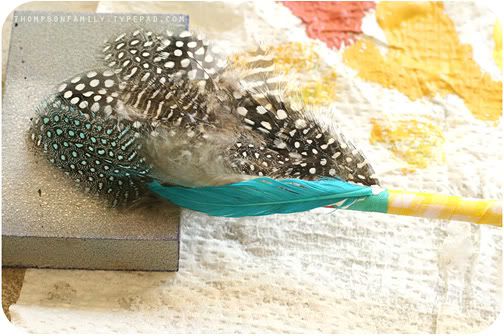
I added some copper tape at the base of the feather arrangement. Add your eraser and copper tape to the other end of the arrow and you’re finished!
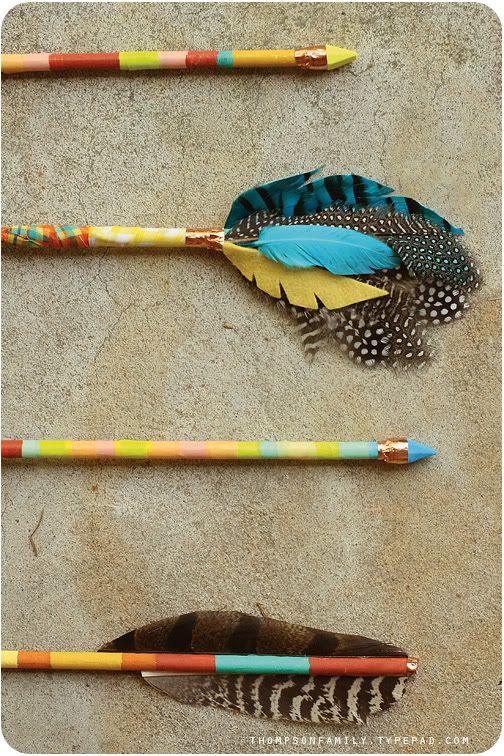
FEATHER #3
Now for the felt feathers. These are my favorites I think. Just cut half-leaf shapes from felt (cutting “notches” out with your scissors) and adhere them to your painted dowel.
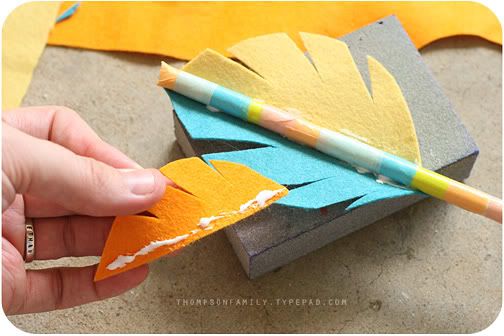

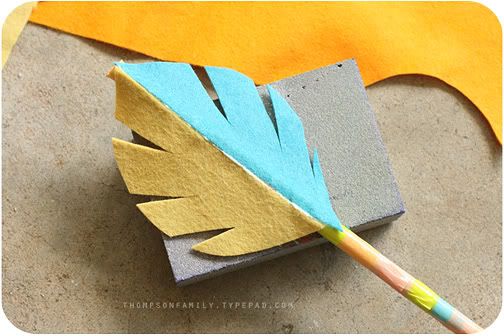
And the back…
Add your eraser and copper tape to the opposite end, and copper tape above the feathers and you’re done!
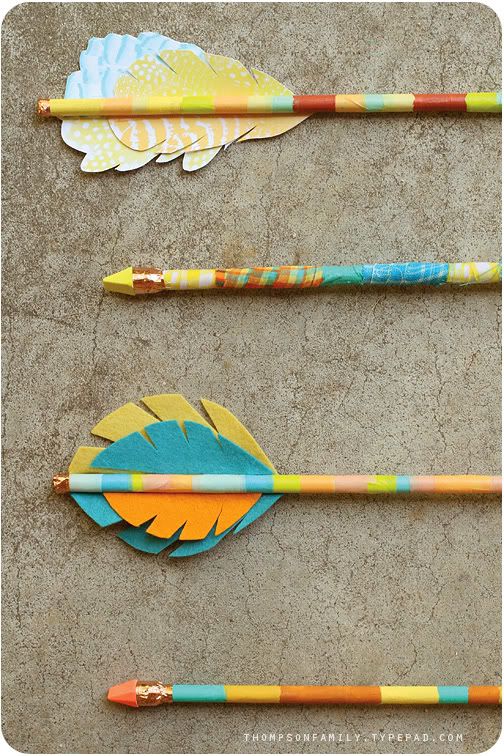
FEATHER #4
And finally, the paper feathers. I used my Monotone Fresh Feathers kit for these. Just open the files in your photo-editing program and print them out. I’ve created a PDF just for Modern Kiddo readers of the feathers that I used in this project that you can print from at home. : ) Download HERE.Just layer them and adhere as you did the other arrows. I left a little space to the right/left of the “spine” on these so I’d have more room for the glue.
That’s it! You’re all done. I hope you enjoy making these as much as I did! If you do make them, please email me your projects at thousandclowns(AT)yahoo.com.. I’d love to see them!

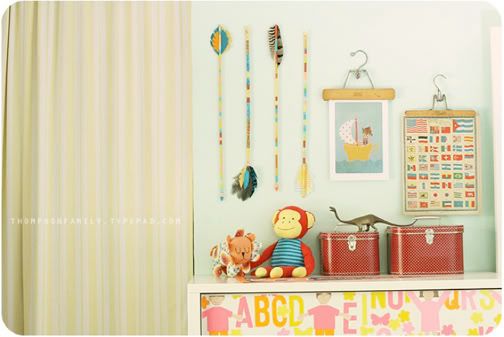
To hang these in the boys’ room, I just used strips of foam tape that you can get at the craft store. I attached it to the arrows and then stuck them on the wall. *Note: I added some of the reddish paint color stripes to the other arrows (painting directly onto the fabric and washi tape) to “unify” the look of the arrows.
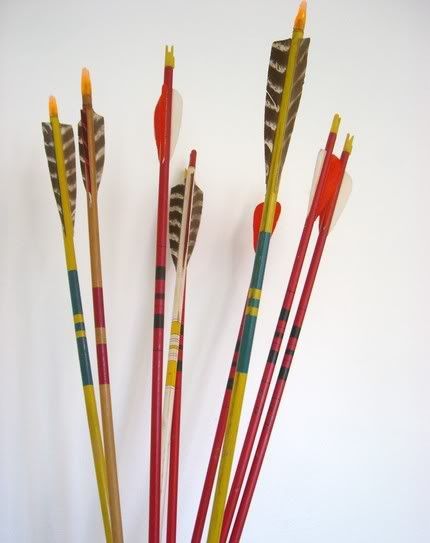
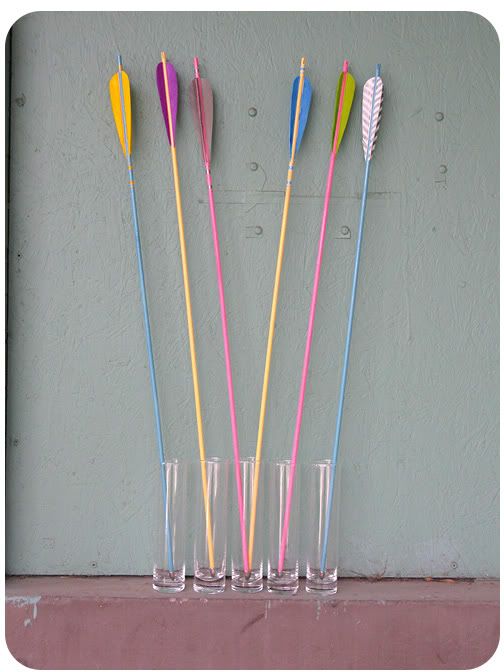
I would love to make some of these for myself, in some pretty “girly” colors. And if you just don’t have time to make some of these (“free time” is a luxury as a parent!), you could always buy these lovely handmade ones on Etsy. Aren’t they beautiful?
Via Modern Kiddo
No comments:
Post a Comment